Feeds:
Posts
Comments

Chicken Parmigiana

I’m not sure if I’ve mentioned it yet, but my husband (Stan) and his friend/coworker Mayur are going to Everest in the Spring. They will trek to North Col, at 23k feet. It is no small trip – it will take a whole month to complete!

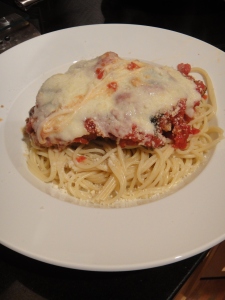
One of their preparations involves gaining weight – 15-20lbs each! A couple weeks ago, we had Mayur over for dinner and I cooked the men a calorie-packed feast of hearty chicken parmigiana and spaghetti.

The recipe comes from “Tyler’s Ultimate” on the Food Network. The show is what it sounds – Tyler Florence travels the country, tastes variations of the same dish, picks out the best elements from each, and then assembles the “ultimate” recipe.

This dish required a good amount of preparation and ingredients. But the guys liked it, so I think it was well worth it. (Even Stan really liked it, and he’s usually not a fan of chicken parm!)

Chicken Parmigiana
from Tyler’s Ultimate

  • 1/4 cup extra-virgin olive oil, plus 3 tablespoons
  • 1 medium onion, chopped
  • 2 garlic cloves, minced
  • 2 bay leaves
  • 1/2 cup kalamata olives, pitted
  • 1/2 bunch fresh basil leaves
  • 2 (28-ounce) cans whole peeled tomatoes, drained and hand-crushed
  • Pinch sugar
  • Pinch red pepper flakes
  • Kosher salt
  • 4 skinless, boneless, chicken breasts (about 1 1/2 pounds)
  • 1/2 cup all-purpose flour
  • Kosher salt and freshly ground black pepper
  • 2 large eggs, lightly beaten
  • 1 tablespoon water
  • 1 cup freshly grated Parmesan, plus extra for sprinkling
  • 1/2 cup chopped flat-leaf parsley leaves
  • 2 teaspoons garlic powder
  • 1 (8-ounce) ball fresh mozzarella, thinly sliced
  • 1 pound spaghetti pasta, cooked al dente

1. Preheat the oven to 350 degrees F.

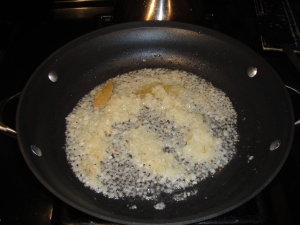
2. Coat a saute pan with olive oil and place over medium heat. When the oil gets hazy, add the onions, garlic, and bay leaves; cook and stir for 5 minutes until fragrant and soft.

chicken-parm-start

cooking the onions, garlic, and bay leaves

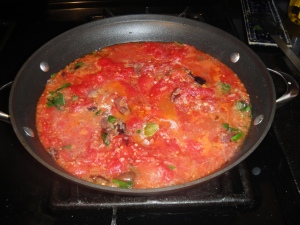
3. Add the olives and some hand-torn basil, reserve the rest of the basil for finishing the chicken. Carefully add the tomatoes (nothing splashes like tomatoes), cook and stir until the liquid is cooked down and the sauce is thick, about 15 minutes; season with sugar, red pepper flakes, salt and pepper. Lower the heat, cover, and keep warm.

chicken-parm-sauce

the finished sauce - keep warm!

4. Get the ingredients together for the chicken so you have a little assembly line. Put the flour in a shallow platter and season with a fair amount of salt and pepper; mix with a fork to distribute evenly. In a wide bowl, combine the eggs and water, beat until frothy. Put the bread crumbs on a plate, add the 1 cup parmesan, chopped parsley, and garlic powder Season with salt and pepper and stir with a fork until thoroughly combined.

5. Heat 3 tablespoons of olive oil over medium-high flame in a large oven-proof skillet. Lightly dredge both sides of the chicken cutlets in the seasoned flour, and then dip them in the egg wash to coat completely, letting the excess drip off, then dredge in the bread crumbs. When the oil is nice and hot, add the cutlets and fry for 4 minutes on each side until golden and crusty, turning once.

6. Ladle the tomato-olive sauce over the chicken and arrange the mozzarella on top. Sprinkle with Parmesan, and remaining basil. Bake for 15 minutes or until the cheese is bubbly. Serve hot with spaghetti.

right out of the oven

serves 4

Each serving has roughly 900 calories… so it’s not diet-friendly!!!
Before making this dish, I had never cooked or eaten polenta. Honestly, I had no desire – I thought it was a boring vegetarian food, high in calories in carbs. It is vegetarian, and it is high in carbs… but it’s not as high in calories as I previously thought, and it doesn’t have to be boring! It’s one of those wonderful foods with endless possibilities – it can take on multiple flavors, and even textures! Immediately after cooking, it has a mashed potato-like consistency. But place it in a baking dish in your refrigerator for a few hours and you’ll get something resembling yellow brownies.

If you’ve never tried polenta – you need to! I loved this dish and polenta has become a new pantry staple for me.

And for those of you wondering, “WTF is polenta?”… it’s just cornmeal!

(You’ll need to plan ahead and prepare the polenta either in the morning or the day before)

Polenta Wedges with Asparagus and Mushrooms
adapted from Everyday Food, January/February 2010

1 cup instant polenta
4 cups water
1 tablespoon plus 2 teaspoons vegetable oil
1 pound white mushrooms, sliced
coarse salt and ground black pepper
3/4 cup low-sodium chicken broth
2 tablespoons whole milk
1 pound asparagus, trimmed

To make the polenta:

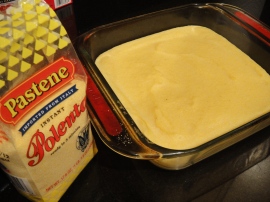
Bring 4 cups of salted water to a boil. Gradually pour in 1 cup instant polenta, stirring continuously for about 3 minutes. Pour into an 8-inch square baking dish coated with cooking spray. Cover with plastic wrap and refrigerate for several hours, or overnight – you can even do it days in advance. (To boost the flavor of your polenta, you may use milk or chicken broth – or both – instead of salted water. The original recipe used a combination – try 1 cup skim milk + 3 cups chicken broth)

prepared polenta

Once the polenta is ready:

1. Heat broiler and position the rack 5 inches from the heat. In a large skillet, heat 1 tablespoon oil over medium-high heat. Add mushrooms and cook, stirring occasionally, until golden brown, about 5 minutes. Season with salt and pepper. Add broth and cook until reduced by half, about 4 minutes. Stir in milk and cook 2 minutes. Remove from heat.

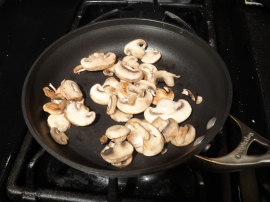
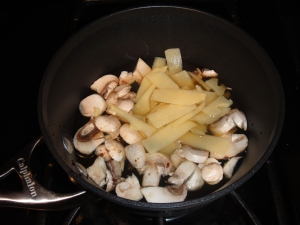
starting to cook the mushrooms

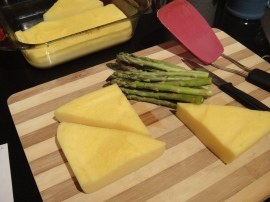
2. Place a rimmed baking sheet in oven to heat. Slice polenta into wedges; pat dry with a paper towel and spray with cooking spray. Spray asparagus with cooking spray.

preparing the polenta and asparagus

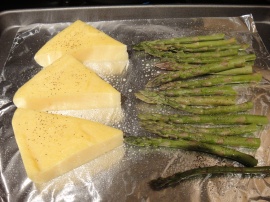
3. Carefully remove hot baking sheet from oven. Place asparagus on one half and place polenta on the other. Season  both with salt and pepper.

before going into the oven

4. Broil until polenta is golden brown and asparagus is crisp-tender, about 6 minutes, rotating sheet and tossing asparagus about halfway through.

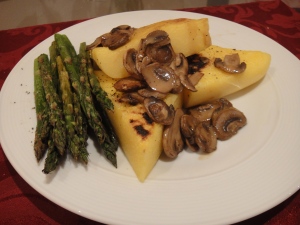
5. Serve polenta wedges with asparagus and mushrooms.

finished dish

Serves 4

1 serving = 4 Weight Watchers points

calories:224
fat: 4.5g (0.9g sat)
carbs: 39.1g
fiber: 4.5g
sugar: 4.8g
protein: 9.5g

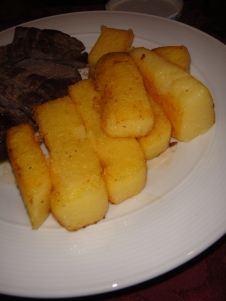
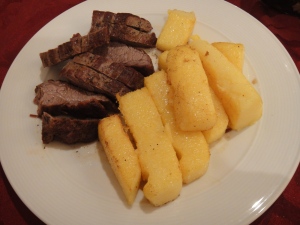
That was way too vegetarian and low-calorie for Stas, so I didn’t make him eat it. Instead, I took a portion of the prepared polenta and pan-fried it in vegetable oil. I served it with sliced flank steak:

fried polenta

They look like Twinkies, don’t they?!

fried polenta and steak

Fried Shredded Potatoes

In my post for Chicken Schnitzel with Mushroom Sauce, you may have noticed that I served it with a side of fried shredded potatoes. I guess a neater version of these would be called a “shredded potato pancake”, but I move them around in the pan so much  that they don’t come out like a pancake in the end.

I don’t really have a specific recipe for these – I just put it together as I go along. The general idea is:

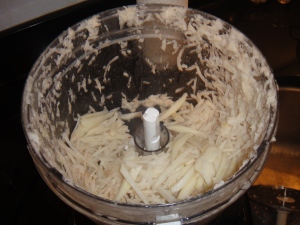
1. Shred potatoes (however many you want!) in a food processor:

2. Melt butter in a pan over medium heat:

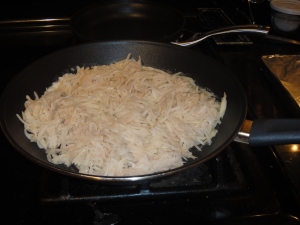
3. Add potatoes and season with salt and pepper:

4. Every so often, flip/rotate the potatoes until evenly browned.

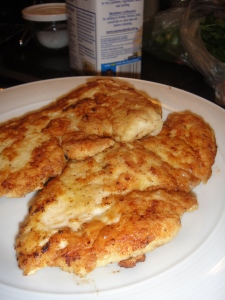
5. Serve. Here they are with my chicken schnitzel:

That’s it! Very very simple. This is one of the sides I make for Stan when we’re out of pasta, or when I’ve made him too many mashed potatoes!

While Stas and I were in New Zealand for our honeymoon (late November – earlyDecember 2009), Stas fell in love with Chicken Schnitzel with Mushroom Sauce. When we returned home, I set out to make my own version.

I had made chicken schnitzel before, on many occasions (it’s simply meat covered in breadcrumbs)… but never with the sauce. My goal was for it to be quick and simple, using only a few common ingredients. Afterall, I usually only cook schnitzel when I’m short on time or when the fridge is almost empty.

It was a success on the first try!

Here’s what I did:

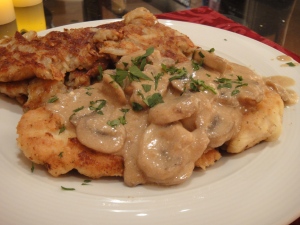
Chicken Schnitzel with Mushroom Sauce

1/3 cup all-purpose flour
1 large egg, beaten
1/4 teaspoon salt
1/4 teaspoon ground black pepper
4 boneless, skinless chicken breasts (you could also use bonleless pork or turkey – but then you can’t call it “chicken schnitzel” 🙂 )
2 tablespoons butter
3 cups white mushrooms
2 cloves garlic, minced
1 1/3 cups chicken stock
1/3 cup sour cream
1 tablespoon soy sauce
2 tablespoons minced fresh parsley

ingredients

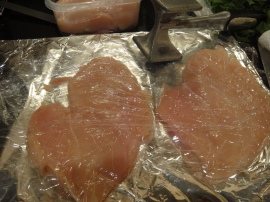
1. Combine flour, salt and pepper in a medium bowl. Place the egg in another bowl. Place chicken breasts on a cutting board, cover with plastic wrap, and pound until thin:

pound the chicken until thin

2. Dredge the chicken breasts in the flour mixture. Gently shake off the excess, then dip them in the beaten egg, then back in the flour. (Doing flour- egg-> flour helps it stick to the chicken, so you’ll have a nice batter when it’s cooked.)

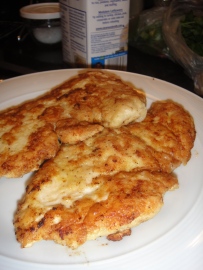
3. In skillet, melt butter over medium-high heat; fry chicken breasts in batches, about 4-5 minutes each side. Transfer to a plate and cover with foil to keep warm.

keep warm

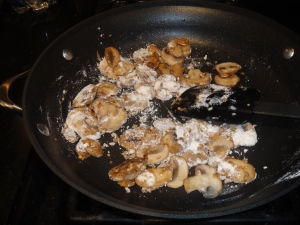
4. In the now-empty skillet, fry mushrooms and garlic until no liquid remains, about 5 minutes.

5. Add reserved flour mixture and cook, stirring for about 1 minute.

fry the mushrooms and garlic, then add flour

6. Stir in stock; bring to a boil, then reduce heat and simmer, stirring, until thickened, about 3 minutes.

7. Add sour cream and soy sauce and stir for about 1 minute.

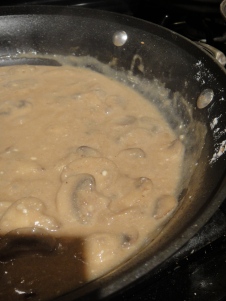
finished mushroom sauce

8. Pour over schnitzel and sprinkle with parsley.

Serves 4

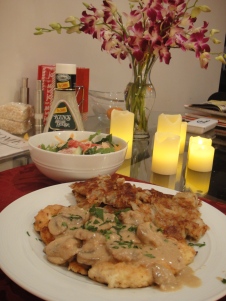
served with fried potatoes and a salad

See the recipe for those fried potatoes here.

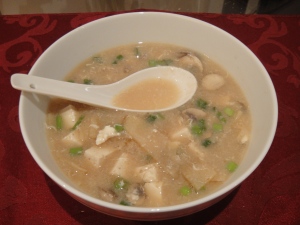
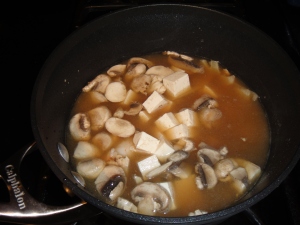
I’ve never had Hot and Sour Soup at a Chinese restaurant, so I don’t even know if I normally like it. But I did not like this recipe! The combination of flavors was way too much for me, and it was a little too spicy for my taste.

But it did get very good reviews on MyRecipes.com, so if you normally like Hot and Sour Soup from a Chinese restaurant, then I suggest trying this (and please let me know how it turned out!)

(Want to try a Chinese soup recipe that I really liked? Try my Egg Drop Soup!)

Hot and Sour Soup with Shrimp
adapted from Cooking Light, October 2006

1 1/2 cups  fat-free, less-sodium chicken broth
1/4 – 1/2  cup  pre-sliced mushrooms
1 1/2 teaspoons  low-sodium soy sauce
1/2 of an 8-ounce can sliced bamboo shoots, drained
1  tablespoon  fresh lemon juice
1/2  teaspoon  white pepper
3/4  pounds  medium shrimp, peeled and deveined
4  ounces  reduced-fat firm tofu, drained and cut into 1-inch cubes
1 1/2  teaspoons cornstarch
1  tablespoons  water
1  large egg white, beaten
1/8  teaspoon  chili oil
1 tablespoons  chopped green onions

Combine first 4 ingredients in a large saucepan; bring to a boil. Reduce heat, and simmer 5 minutes.

Add juice, pepper, shrimp, and tofu to pan; bring to a boil. Cook 2 minutes or until shrimp are almost done.

Combine cornstarch and water in a small bowl, stirring until smooth. Add cornstarch mixture to pan; cook 1 minute, stirring constantly with a whisk. Slowly drizzle egg white into pan, stirring constantly. Remove from heat; stir in chili oil and onions.

serves 2

1 serving = 5 Weight Watchers Points

Calories: 233
Fat: 4.7g
Protein: 38g
Carbohydrate: 9.4g
Fiber: 2.3g

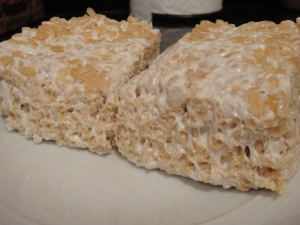
Looking to pimp your everyday Rice Crispy Treats recipe? Look no further! All you have to do is brown the butter (a lot of butter), and add a little sea salt.

While many of you out there may have made New Years resolutions to lose weight, my husband is on a quest to gain 15lb. by the end of April, for his trip to Everest. So these treats are right up his alley!

Salted Brown Butter Rice Crispy Treats

4 ounces (1 stick) unsalted butter
1 10-ounce bag marshmallows
1/4 teaspoon coarse sea salt
6 cups crispy rice cereal (Rice Krispies)

1. Coat an 8-inch square cake pan with cooking spray (or use butter).

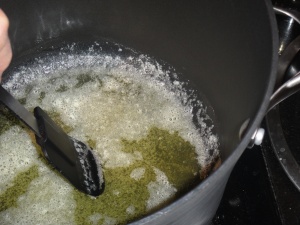
2. In a large pot, melt butter over medium-low heat. You’ll need to be patient and vigilant during this step… the butter will melt, then foam, then turn clear golden, then finally start to turn a light brown. Stir frequently and keep your eyes on the butter – if it cooks for too long, it will burn.

browning the butter

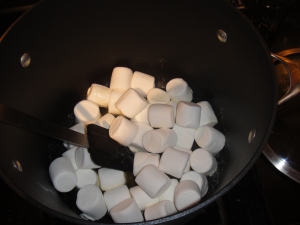
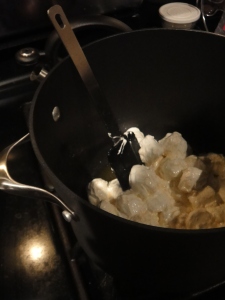
3. As soon as the butter turns a light-brown color, turn the heat off and stir in the marshmallows – the heat from the melted butter should be enough to melt them (if it is not, turn it back on low until the marshmallows are smooth.)

add the marshmallows

melt the marshmallows

almost there!

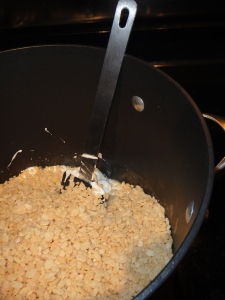
4. Add the salt and cereal; stir to combine.

add the rice crispies

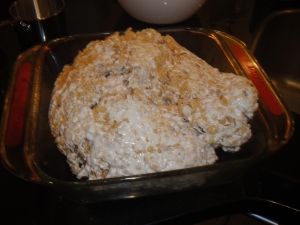
5. Spread the mixture into the prepared pan. Press down firmly and evenly with a piece of wax or parchment paper, or a spatula.

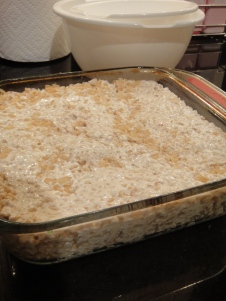
dump into baking dish

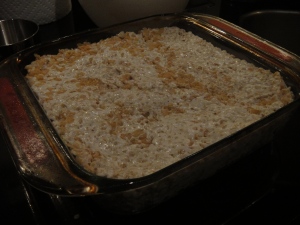
press to flatten

6. Let it cool completely, then cut into squares and serve.

let cool

let it cool

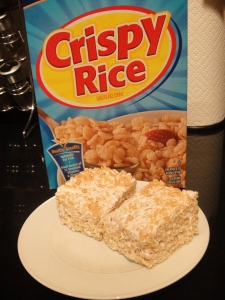
cut into pieces and enjoy

Serves 9-16 – depending on how you cut them

If you make 9:

  • 1 serving = 5 Weight Watchers Points
  • calories: 264
  • fat: 10.5g
  • carbs: 40.8g (5g fiber, 16.5g sugars)
  • 1.6g protein

If you make 16:

  • 1 serving = 3 Weight Watchers Points
  • calories: 148
  • fat: 5.91g
  • carbs: 22.95
  • 0.9g protein

Olivier (Russian Salad)

Olivier (pronounded o-liv-ee-ay) is a staple of any Russian New Year table. The original recipe was invented in the 1860’s by Lucien Olivier, the French chef of the Hermitage restaurant in Moscow. The exact original recipe is unknown, but it’s said to have contained grouse (a type of bird), veal tongue, caviar, lettuce, crayfish tails, capers, pickles, cucumbers, hard-boiled eggs and possibly soy beans.

One of the Hermitage sous-chefs, Ivan Ivanov, secretly attempted to learn the recipe by observing Olivier. Soon after, Ivanov left to work for a rival restaurant called Moskva. There, he began to serve a suspiciously similar salad called “The Capital Salad” – although it was reported that the recipe was of a lower quality than Olivier’s and that it was missing something.

Ivanov eventually sold the recipe to various publishers. In 1905, the Hermitage restaurant closed and Chef Olivier left Russia. From then on, the salad could be referred to as “Olivier”.

One of the first printed recipes for the Olivier salad (1894) called for half a hazel grouse, two potatoes, one small cucumber (or a large cornichon), 3-4 lettuce leaves, 3 large crawfish tails, 1/4 cup cubed aspic, 1 teaspoon of capers and 3-5 olives and 1 1/2 tablespoon provencal dressing (mayonnaise).

Because many of the salad’s ingredients were rare, expensive, or seasonal, they were gradually replaced with cheaper and more common foods, until it evolved into today’s version.

If you try to Google “Olivier recipe”, you’ll notice that no two recipes are alike – everyone seems to have their own version. Meat or no meat… if there is meat, it may be either tongue, chicken or bologna… white onion, red onion, or green onion… straight mayonnaise or a mixture of mayonnaise and sour cream… etc.

This was my first attempt at making the salad. Beware that my recipe makes A LOT! I started with a medium-sized bowl and quickly had to upgrade to a larger bowl.

Olivier (Russian Salad)
serves a lot!

1/2 lb. – 1lb. bologna
1 (15 oz.) can of sweet peas
3 medium-sized potatoes
4-5 medium-sized carrots
5 eggs
1 bunch of green onions
1 bunch of fresh dill
4-5 pickled dill cucumbers (pickled with salt, not vinegar)
ground black pepper
salt
mayonnaise

1. Boil the carrots and potatoes ahead of time and hard-boil the eggs; make sure they are cooled to room temperature before making the salad.

(A trick to boiling the potatoes is to quarter them and boil them with the skin ON – this will prevent them from turning to mush)

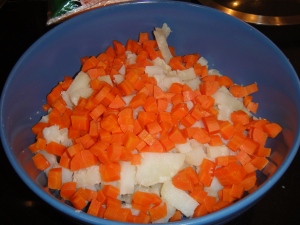
2.  Skin the boiled potatoes and dice them into small cubes. Add to a large bowl:

cubed boiled potatoes

3. Skin and dice the carrots into small cubes (about the same size as the potatoes); add them to the bowl. The goal is to keep everything to about the same size:

diced boiled carrots

4. Drain the can of peas and add the peas to the bowl:

canned sweet peas

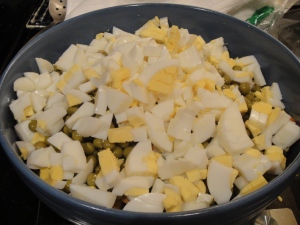
5. Dice the eggs into small cubes and add them to the bowl:

diced hard-boiled eggs

6. Dice the pickles into small cubes and add them to the bowl:

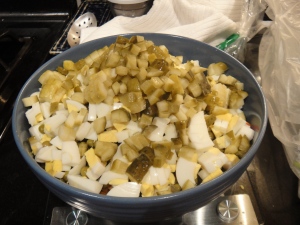
cubed dill pickles

7. Dice the bologna into small cubes and add them to the bowl:

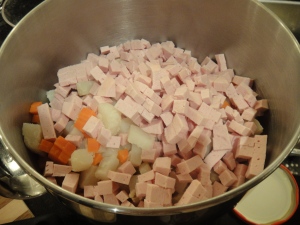
cubed bologna

8. Slice the green onions (tops and whites) and add them to the bowl:

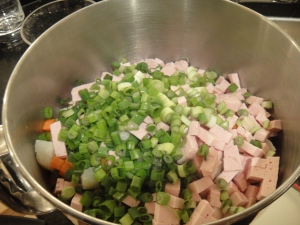
sliced green onions

9. Chop the dill and add it to the bowl:

chopped dill

10. Season with salt and pepper and add the mayonnaise – no specific amounts here – just add them all to taste. Mix everything well.

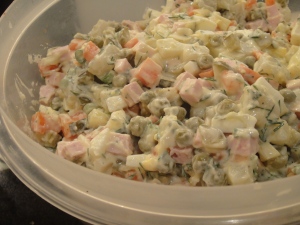
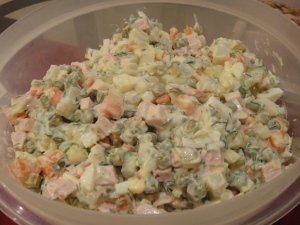
finished salad

Enjoy – and Happy New Year 🙂

Happy New Year!

Happy New Year! I hope everyone had a safe and happy New Years Eve.  When I returned home from work yesterday, Stas surprised me with a gorgeous bouquet of orchids. We’ve had quite the exciting year together – getting married, honeymooning in New Zealand. It’s exciting to think about what 2010 has in store for us 🙂

My New Years orchids from Stas

We celebrated our evening with friends – eating, drinking, laughing, and reflecting a bit on where we were at the turn of the last decade (I was only a junior in high school!).

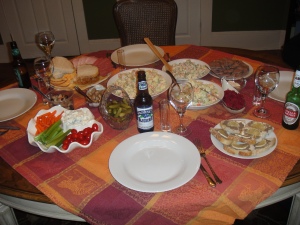
The table was well-stocked with Russian zakuski (Russian snacks):

the full table

There was cow tongue with horseradish:

cow tongue

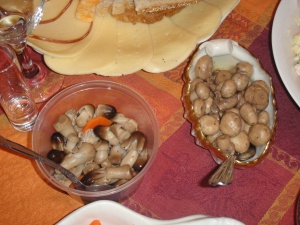
two types of mushrooms:

mushrooms

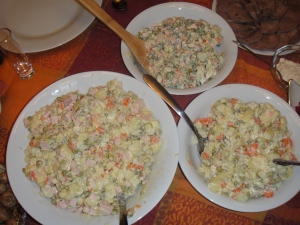
Three variations of Olivier (my version, Oleg’s version, and a vegetarian version)… Recipe to come:

Olivier

And of course, there was champagne at midnight:

Happy New Year!

I hope you all had a safe and happy New Years Eve 🙂

MERRY CHRISTMAS EVE!!!
I was way too anxious for Christmas last night, so Stas and I exchanged gifts 1 day early (we usually exchange them on Christmas Eve, before we head over to my parents’ house). I have him 2 casual button-down shirts, flannel pajama pants to match mine (I want to have matching pajamas on Christmas morning!), some small things for his trip to Everest, a big warm coat for Everest, and 2 t-shirts. Believe it or not, the t-shirts were my big special surprise gift to him...

During our honeymoon in New Zealand, Stas forgot some clothes at a hotel in Queenstown. One of the items was his Icarus Canopies t-shirt, given to him by the company when he bought his canopy (his “skydiving parachute”). Although he retired from skydiving earlier this year, I knew the shirt had special meaning to him. As soon as we got back to the States, I contacted the company via Facebook, told them about the lost t-shirt, and they sent me 2 new ones! Stas was very happily surprised when he opened them 🙂

My gifts were gift certificates (1 hour massage, Nordstrom, sushi, and a voucher for 1 week of not having to take care of the bunny), an infinity scarf from The Limited, a “Cute Overload” page-a-day calendar, and he paid to have my car serviced earlier this week 🙂

As I mentioned in yesterday’s post, we spend each Christmas Eve with my mom’s side of the family. This year, my mom wasked me to bring 2 appetizers – the first was the butternut wontons, and the second is this salad.

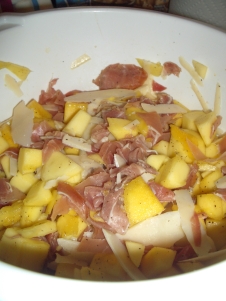
This was my first time buying and cutting mangoes… and I didn’t do a great job at either. One of the mangoes was perfectly ripe, but I think the other 3 were a bit under-ripe (I’m hoping that with the cheese and prosciutto, no one will notice). To cut the mangoes, I used this site as a guide – but it was still tricky as hell!

Aside from that, the recipe was easy – only 4 ingredients and 1 step.

I haven’t tasted it yet, but it got great reviews on the Cooking Light site.

Prosciutto, Mango, and Parmesan Salad
from Cooking Light, December 1998

4  cups  coarsely chopped peeled mango (about 4 mangoes)
4  ounces  thinly sliced prosciutto, coarsely chopped
3  ounces  shaved Parmigiano-Reggiano cheese
1/4  to 1/2 teaspoon freshly ground black pepper

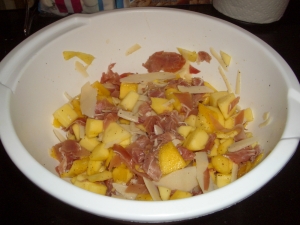
1. Combine all ingredients in a bowl, and toss gently.

Serves 15

ready to serve

1 serving = 1 Weight Watchers point

Calories: 64
Fat: 2.3g (1.2g sat.)
Protein: 4g
Carbohydrate: 7.7g
Fiber: 0.7g

Crispy Butternut Wontons

Christmas Eve is tomorrow… can you believe it?! The holiday really crept up on me this year – especially since we spent the end of November/beginning of December in New Zealand.

This year, my mom has asked me to bring 2 appetizers to the family get-together. Unfortunately, I have to work the first half of the day tomorrow, so today I pre-made 1 of them – the crispy butternut wontons.

I probably should have doubled the recipe, but there will be so much other food there, so I’m not too worried about it.

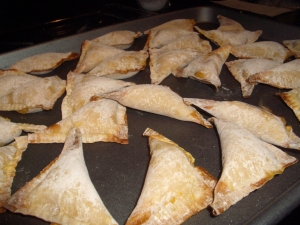
I’m pleased with how easy this recipe was, and the wontons certainly smelled good while in the oven. No taste-test until tomorrow!

The second appetizer is a simple prosciutto and mango salad, which I’ll have time to make tomorrow – and eventually blog about.

(The original recipe for these wontons also included a recipe for a spicy tomato sauce. To save time and money, I just bought some  tomato-basil sauce at the store!)

Crispy Butternut Wontons
from Cooking Light, November 2003

1  small butternut squash (about 1 1/2 pounds)
1/2  cup  water
1/2  cup part-skim ricotta cheese
3  tablespoons  grated Parmesan cheese
2  tablespoons  dry breadcrumbs
1/4  teaspoon  sea salt
1/4  teaspoon  freshly ground black pepper
1/8  teaspoon  ground nutmeg
1  teaspoon  water
1  large egg, lightly beaten
24-30  wonton wrappers
Cooking spray

Preheat oven to 375°.

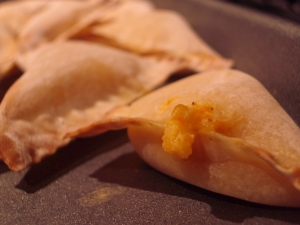
To prepare wontons, cut the squash in half lengthwise; discard seeds and membrane. Place the squash halves, cut sides down, in a 2-quart baking dish; add 1/2 cup water. Bake at 375° for 45 minutes or until squash is tender when pierced with a fork; cool. Scoop out pulp to measure 1 cup, and reserve the remaining pulp for another use. Combine 1 cup pulp, ricotta, Parmesan cheese, breadcrumbs, salt, pepper, and nutmeg, stirring until well combined.

Combine 1 teaspoon water and egg, stirring with a whisk. Working with 1 wonton wrapper at a time (cover remaining wrappers with a damp towel to prevent drying), spoon about 2 teaspoons squash mixture into center of each wrapper. Brush edges of dough with egg mixture; bring 2 opposite corners together. Press edges together to seal, forming a triangle. Repeat procedure with remaining wonton wrappers and squash mixture.

Place the wontons on a large baking sheet coated with cooking spray, and brush lightly with remaining egg mixture. Bake at 375° for 17 minutes or until golden and crisp. Serve with the sauce.

Serves 8

(Note: I actually forgot to brush my wontons with the egg mixture, so they didn’t come out as nice and shiny as the recipe’s picture)

(the following nutritional information comes from the original recipe, which called for whole ricotta and included the spicy tomato sauce)

1 serving = 3 Weight Watchers points

Calories: 157
Fat: 4.6g (2.1g sat.)
Protein: 6.8g
Carbohydrate: 22.3g
Fiber: 2g